or How to Become a Packager
Hint: Use GitHubs TOC icon at the upper right corner of this Readme for easier navigation.
Goals:
- short general introduction on what are packages and why we have them
- general collection of tools and processes that packagers use and follow
- general collection of tips, snippets and best practises useful for packagers of all distributions and systems
- distribution/system specific cheat sheets, HOWTOs, walk throughs and hints
This guide will (for now) focus on traditional packaging, not on containerized applications.
It helps tremendously if you, as a maintainer, are using the software yourself. If you stop using the software, it's best to let someone else that actively uses it to maintain it. This will make your contributions more reliable and more meaningful for yourself. More importantly, it will feel less of a job and be more of a rewarding experience -- you keep software you need in updated state and at same time, you are keeping the entire distribution updated and bug free.
This will not be an accurate history lesson. We just want to give you some ideas.
In the early days people were sitting in front of their Slackware machine and when they wanted to install a new software they had to do this by hand. They got a tarball with the sources from a website, via email or mailing list, from an (FTP) server, from CVS and so on. They inspected the sources and learned how to build the software. Some of this software even had Makefiles and were configured with Autotools.
As an example, let's do this now:
wget https://github.com/jubalh/nudoku/archive/refs/tags/2.1.0.tar.gz
tar xfv 2.1.0.tar.gz
cd nudoku-2.1.0
autoreconf -fi
./configure
make
And at that point you probably get an error because one of the dependencies of Nudoku is not installed. In this example that will be ncurses.
So now you stop the install process and go find the sources for ncurses and compile and install that first.
And if that ncurses has additional missing dependencies? You guessed it!
Linux distributions provide packages to make this process much easier. Packages contains
- the upstream source files
- instructions how to build them
- listing the dependencies and build dependencies
- doing additional work like transforming configuration files, restart services etc.
If you are using a package manager and tell it to install such a package, it will install all the packages that are a dependency of this package as well.
Some dependencies are needed for building the software while others only for running it.
So you have build time and run time requirements. After you build the package, you will notice that there are parts that do different things. Some parts can be used for building other software while others are used at run-time. So being a clever maintainer, you create multiple binary packages - ncurses for run-time part and a ncurses-devel package for development headers.
Distributions have different naming regulations regarding such packages. Some distributions don't split packages up in development files (eg. Arch), some call them -dev (Debian) some call them -devel (openSUSE).
Some distributions and systems provide build recipes (Gentoo, pkgsrc, AUR) while others ship built binaries (Debian, Fedora, openSUSE) ready to be used.
Some distributions require the packager to build and upload the binaries on his own machine others use build systems.
To maintain integrity of packages, today these will be usually signed and signatures are verified prior to installation. For example the Open Build Service will check whether the tarball that is in a project actually is the same as the upstream tarball (if you use the URL in the spec file), it can then also check a hash (if provided) and also the author in case upstream signed the tarball with their GPG key. It then builds the package for the specified architectures and will sign those packages with repository key.
By the way, the Open Build service can not only build rpms for openSUSE. It can also build packages for Fedora, RHEL, Arch, Debian, Ubuntu, AppImages..
It's recommend to read the RPM Packaging Tutorial now. Even if you are not interested in becoming a packager for an RPM based distribution this will serve as a good introduction.
A packager or a package maintainer is the person who makes this magic happen.
Thanks to them you can easily install software using your package manager eg zypper install libreoffice.
- Package software from scratch (creating build recipe, a deb rpm ebuild and so on).
- Follow rules and guidelines of your particular distribution when packaging new software.
- Track upstream activity or at least new releases.
- Be aware and/or get notified about new security issues of your packages
- React to bugreports and categorize them as valid, invalid, configuration mistake, user mistake, valid bug..
- Debug software and reproduce bugs.
- Patch your package and provide fixes. This may entail coordinating with upstream or forwarding the bug entirely to them.
- Forward your fixes to the upstream project so that everyone benefits from it, including you when new version is released.
- Coordinate with other maintainers. There can be several maintainers for one package.
In a perfect world, you, as package maintainers, are in close contact with upstream. You monitor their development and take important bugfixes.
Here are some ways how you can monitor a project or get notified about new releases:
- Join the
-announcemailing list of the project. - watch the project on GitHub/GitLab (a button in the top right corner).
- Some distributions have their own tooling that reminds you about new releases. Debian uses a watch file.
- Subscribe to the projects RSS feed. If they use GitHub (and maybe GitLab etc as well) they automatically publish an RSS feed eg.
https://github.com/profanity-im/profanity/releases.atom. I use the newsboat RSS reader and each morning check for new releases vianewsboat -u ~/watchedprojects.rss. - Use nvchecker.
- Monitor their websites via urlwatch.
- Use the website fresh code.
- Use the website newreleases.
- Use the website release monitoring.
To get an overview of which distro ships which version of a particular software we like to use repology. For example see this overview.
maintainer.opensuse.org also tracks packages from various sources.
Try not be to be "hit and run" maintainer. Doing just a version bump is not enough when updating your package.
You should also:
- check that it builds
- write a changelog with changes interesting for users (depending on distribution guidelines)
- run the upstream testsuite, ideally as part of the build process
- test it yourself (best is if the maintainer themself is a regular user of the software)
- run your distribution tests (openSUSE, Debian and Fedora use openQA for automated tests)
If there are too many (known) issues with the new version you need to decide whether an update is actually in the interest of the users.
Rolling release distributions want the latest working version and not the latest no matter whether broken or not.
If the update is a point release with bug fixes only, you need to consider whether you have to update stable repositories as well.
As a packager you need to be familiar with the particular bugtracker your distribution uses.
Bugzilla is used by:
Launchpad is used by:
GitHub is used by:
GitLab is used by:
Additionally it would be good if you are used to the issue trackers used by the programs you maintain. This might be on GitHub, GitLab, Sourceforge, sourcehut or just a mailing list or custom solution.
When a vulnerability is discovered they get reported at MITRE and a Common Vulnerabilities and Exposures or short CVE is created.
They usually look like CVE-YEAR-NUMBER. You might have heard of Heartbleed which for example got CVE-2014-0160 assigned.
Once such a CVE is discovered, the security teams of a distribution get notified. They then fix the bug or forward the information to the maintainer which should fix the bug. This depends on the policies of the particular distribution.
Some vulnerabilities are under an embargo and maintainers should not mention it publicly or release it until a certain date.
The software you package will come with a license. You need to be aware which licenses your distribution allows to ship in their repositories. You can find a list of licenses and their identifier on the SPDX website.
Since most distributions ship binary packages and attackers could attack the build system, it is useful to have a way to verify these packages. Various entities could follow the build instructions and verify whether the result is the same. Packagers can help the Reproducible builds project by ensuring their maintained software can be build reproducibly.
Debuginfo packages contain symbols that were stripped from the ELF binaries shipped with the normal packages. This reduces size by removing information unimportant for the general user. However once we want to debug this information might be valuable. They also contain the sources code of the binary.
Debuginfod is a client/server that automatically distributes elf/dwarf/source-code from servers to clients such as debuggers across HTTP.
This has the advantage that you don't need to install debuginfo packages manually.
Various distributions run their own debuginfod server instances. Like for example Debian, Arch Linux or Ubuntu.
A coredump is a file which contains the memory of a process. We can configure our system to create them when a program terminates unexpectedly, for example, when a segmentation fault occurs.
A segfault happens when a program tries to access memory that it should not access.
Read up on how to configure core dumps on your system. And check ulimit.
- Linux core dump analysis by sergioprado.
- How to get a core dump for a segfault on Linux by jvns.
- Debug a crash after it happened – without knowing about it upfront by DimStar77.
- Per service ulimits by darix.
A stack trace, or backtrace, is a list of functions that are active in a running program. One function calls another, so they are nested, and the program needs to record where it left one function. This is done on the stack. The backtrace is this list of active nested functions and can be useful to point us to the code which is buggy.
When users report bugs they sometimes attach stack traces or coredumps. Or we maintainers ask them to do so.
Debug symbols need to be installed or debuginfod enabled. Read the gdb section of this Readme to learn the basics of gdb. Once the program is started in gdb try to reproduce the crash. A backtrace can then be created via:
(gdb) thread apply all backtrace full
This is an example of what it might look like:
0x000000350a6c577f in *__GI___poll (fds=0xe27460, nfds=9, timeout=-1) at ../sysdeps/unix/sysv/linux/poll.c:83
83          return INLINE_SYSCALL (poll, 3, CHECK_N (fds, nfds), nfds, timeout)
When the crashed program created a core dump you can use gdb to get a stack trace as well:
gdb $program $coredumpfile

(gdb) thread apply all backtrace full
Diff is a command line tool for comparing two files or directories.
You have an upstream tarball and want to create a patch with the changes:
tar xfv upstream-version.tar.gz
cp -r upstream-version upstream-version.new
vi upstream-version.new/Makefile upstream-version.new/main.c
diff -urEbw upstream-version upstream-version.new > my.patch
Patch is a command line tool that applies a diff output file (patch) to an original file.
One important parameter is -p which strips leading path segments, basically ignoring parts of the path.
For patches created by git you will usually use -p1 to apply them.
patch -p1 < my.patch
quilt is a tool for managing many patches.
quilt series shows a list of all patches.
quilt push/pop navigate the patch stack up and down. Before a patch is applied, all affected files are backed up to the .pc/patch directory.
Sometimes there is a patch that can't be applied because of the file difference. In these situations you can use wiggle or try to adjust patch manually:
- Use quilt to apply patch
- If quilt failed, force it to apply as much as possible by the parameter -f (force)
- Quilt applies what it is able to apply and saves the rest to file.rej files
- Check the file.rej and do desired changes in the specified files manually
- refresh the patch
We will use an example based on an openSUSE package. The quilt part is universal though.
Check out the package and call quilt setup which will create a new folder with the source code:
osc bco graphics/tiff
cd graphics tiff
quilt setup tiff.spec
There might already be patches mentioned in the spec file so lets apply them and then start a new patch:
quilt push -a
quilt new tiff-security-fix-1.patch
Edit the files that need fixing and create a patch:
quilt edit libtiff/tif_dirwrite.c
quilt header -e  #at the top of the header we want some explanation/references etc
quilt refresh
Instead of quilt edit file you could also use quilt add file and $EDITOR file.
Now we have a new file tiff-security-fix-1.patch which we can apply in the spec file.
After initializing of a source tree, use quilt push X, where X stands for the number of patches you want to apply. Use this command in order to get to the position of the patch you want to alter. Afterwards just edit the file corresponding to the patch and refresh this patch. If you edit a file that isn't contained in the patch, remember to add this file by quilt add.
A shortcut here to make sure that the file is tracked by quilt before editing it, you can use quilt edit $(file).
wiggle applies rejected patches and performs word-wise diffs. So it will apply everything even things that may not be correct. It is quite powerful but needs extra careful checking.
- Use quilt to apply patch
- If quilt failed, force it to apply as much as possible by the parameter
-f(force). It applies what it is able to and saves the rest to*.rej(rejected) files - Use
wiggle --replace file file.rejto try and apply the changes that quilt could not apply
We have the following patch:
--- telnet-bsd-1.2.orig/telnet/commands.c
+++ telnet-bsd-1.2/telnet/commands.c
@@ -2450,17 +2450,21 @@ tn (int argc, char *argv[])
    error = getaddrinfo (aliasp, "0", &ahints, &ares);
    if (error)
    {
+     printf ("Couldn't get address for %s\n", aliasp);
       warn ("%s: %s", aliasp, gai_strerror (error));
       close (net);
-      freeaddrinfo (ares);
+     net = -1;
       continue;
}
Since the patch was created the telnet/commands.c file has already been changed.
warn ("%s: %s", aliasp, gai_strerror (error));
printf("This is a test");
int a = 5;
freeaddrinfo (ares);
printf("This is another test");
break;
Try quilt:
quilt push
Applying patch patches/telnet-bsd-1.2-hostalias.patch
patching file telnet/commands.c
Hunk #1 FAILED at 2450.
1 out of 1 hunk FAILED -- rejects in file telnet/commands.c
patching file telnet/telnet.1
Patch patches/telnet-bsd-1.2-hostalias.patch does not apply (enforce with -f)
Use -f option:
$ quilt push -f
Applying patch patches/telnet-bsd-1.2-hostalias.patch
patching file telnet/commands.c
Hunk #1 FAILED at 2450.
1 out of 1 hunk FAILED -- saving rejects to file telnet/commands.c.rej
patching file telnet/telnet.1
Applied patch patches/telnet-bsd-1.2-hostalias.patch (forced; needs refresh)
The telnet/commands.c.rej file was created. Now the Wiggle can be used:
$ wiggle --replace commands.c commands.c.rej
Inspect the telnet/commands.c file to see that the changes from the patch were successfully applied:
printf ("Couldn't get address for %s\n", aliasp);
warn ("%s: %s", aliasp, gai_strerror (error));
printf("This is a test");
int a = 5;
net = -1;
printf("This is another test");
break
;
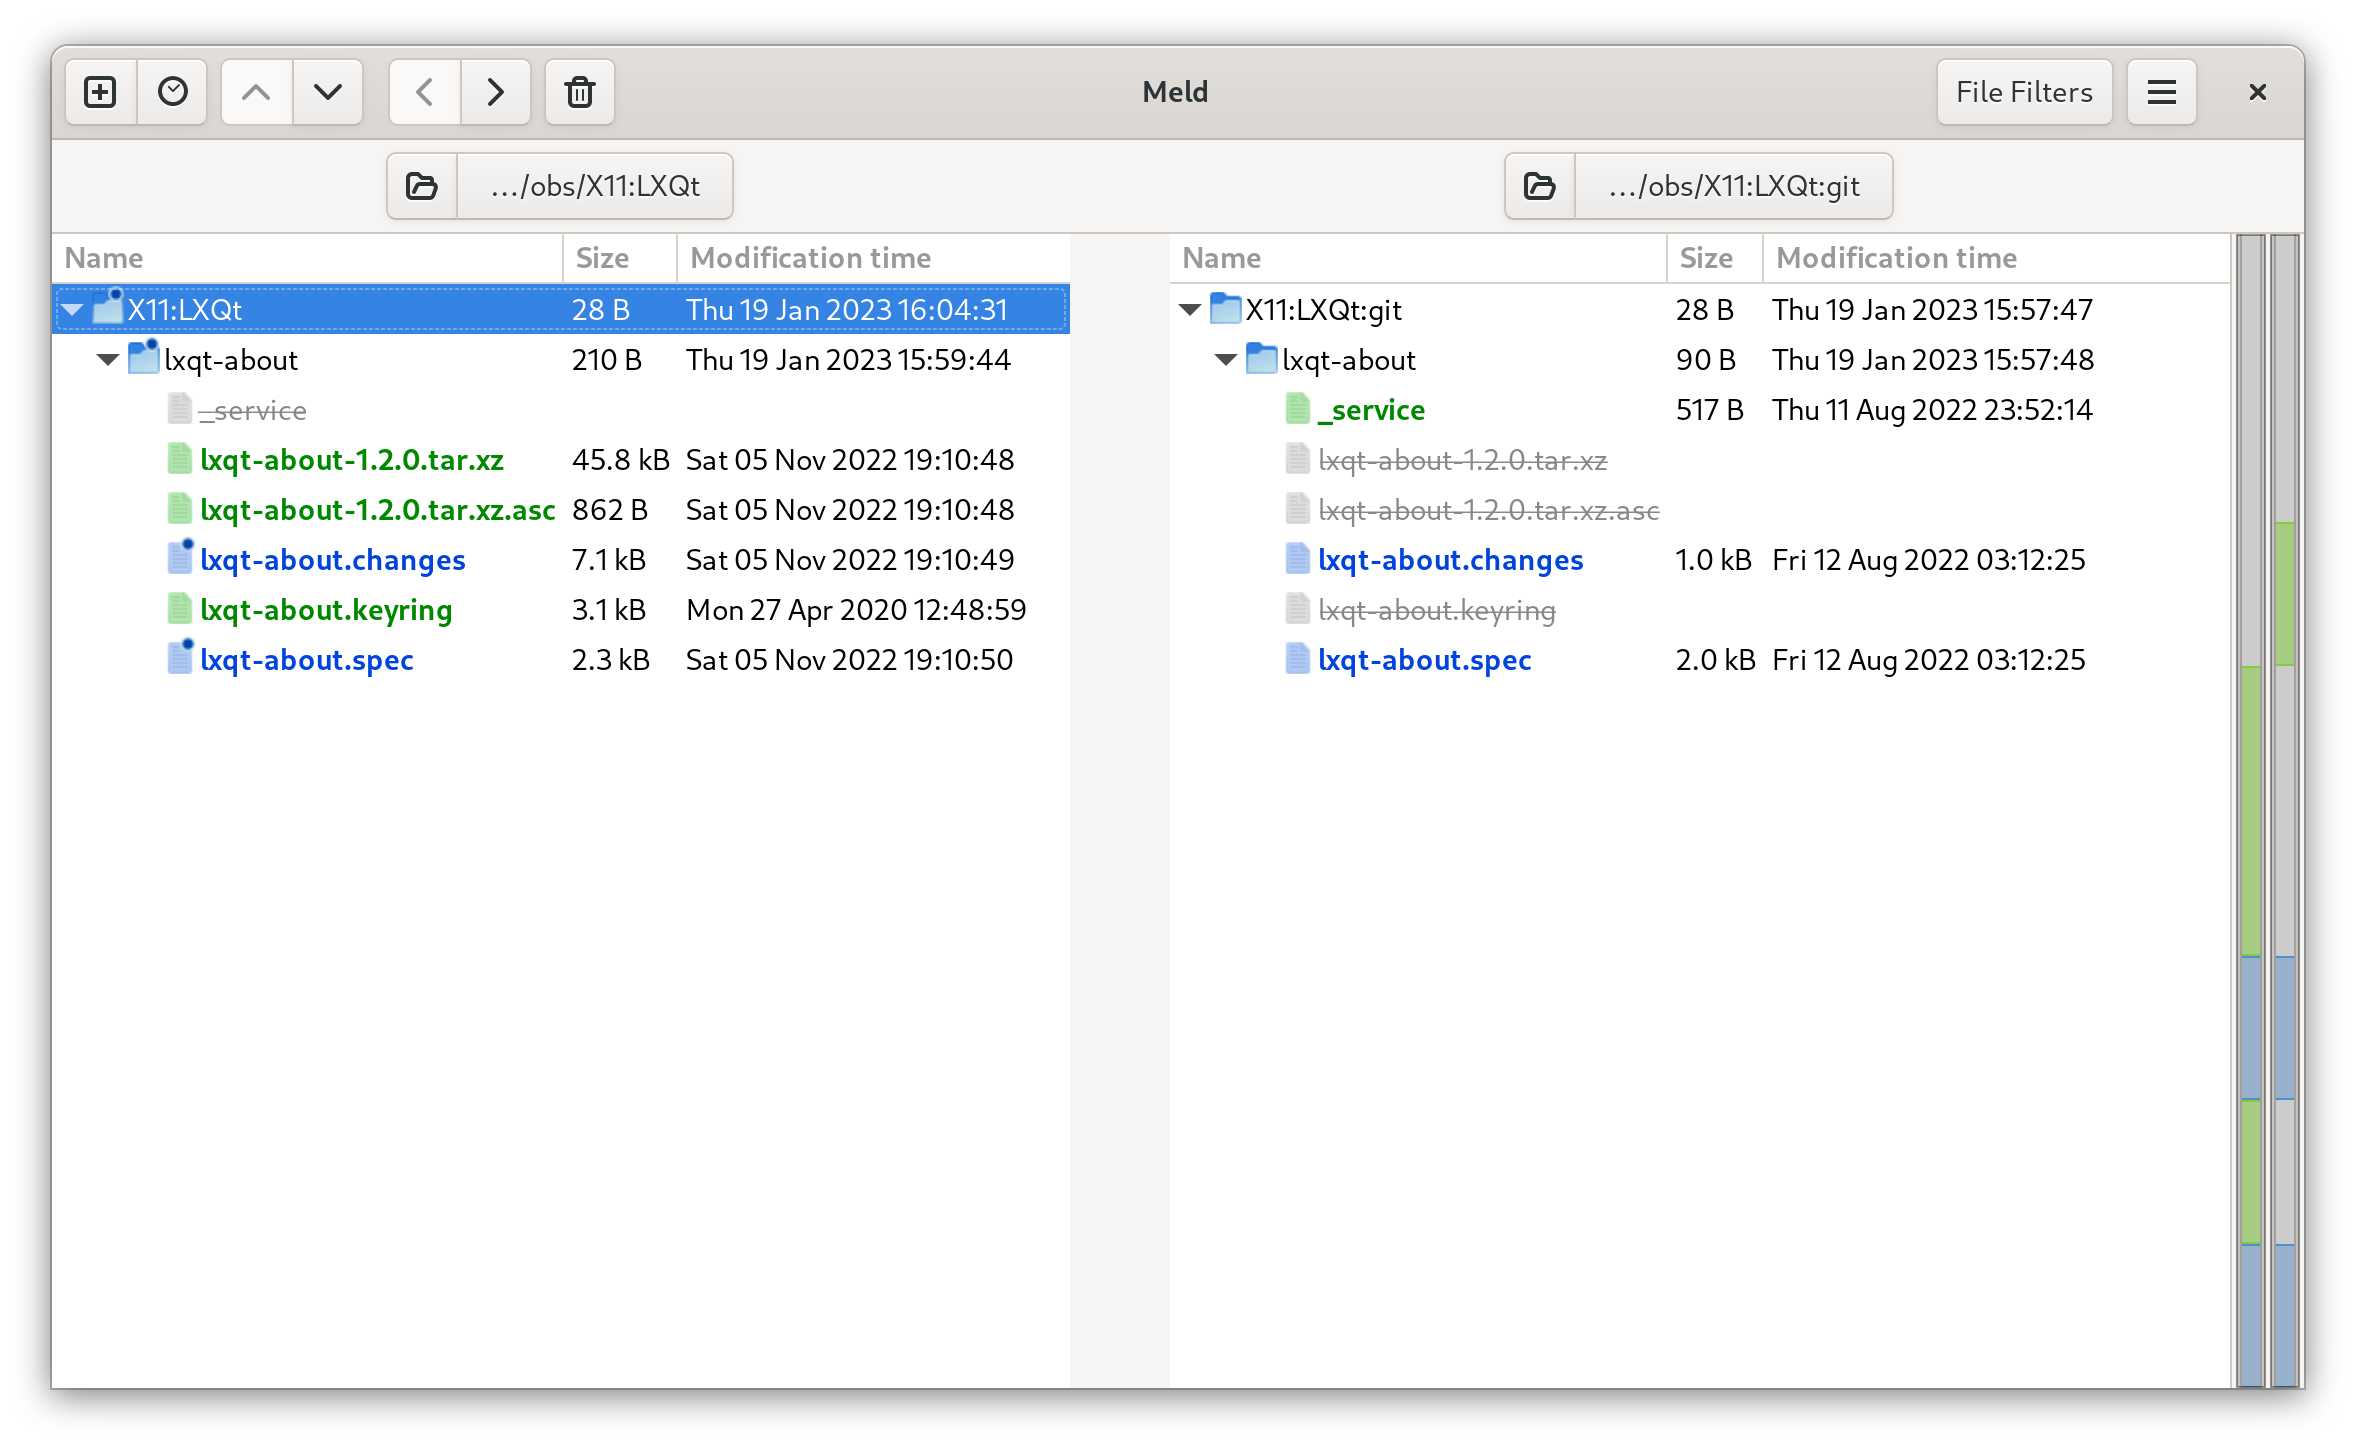
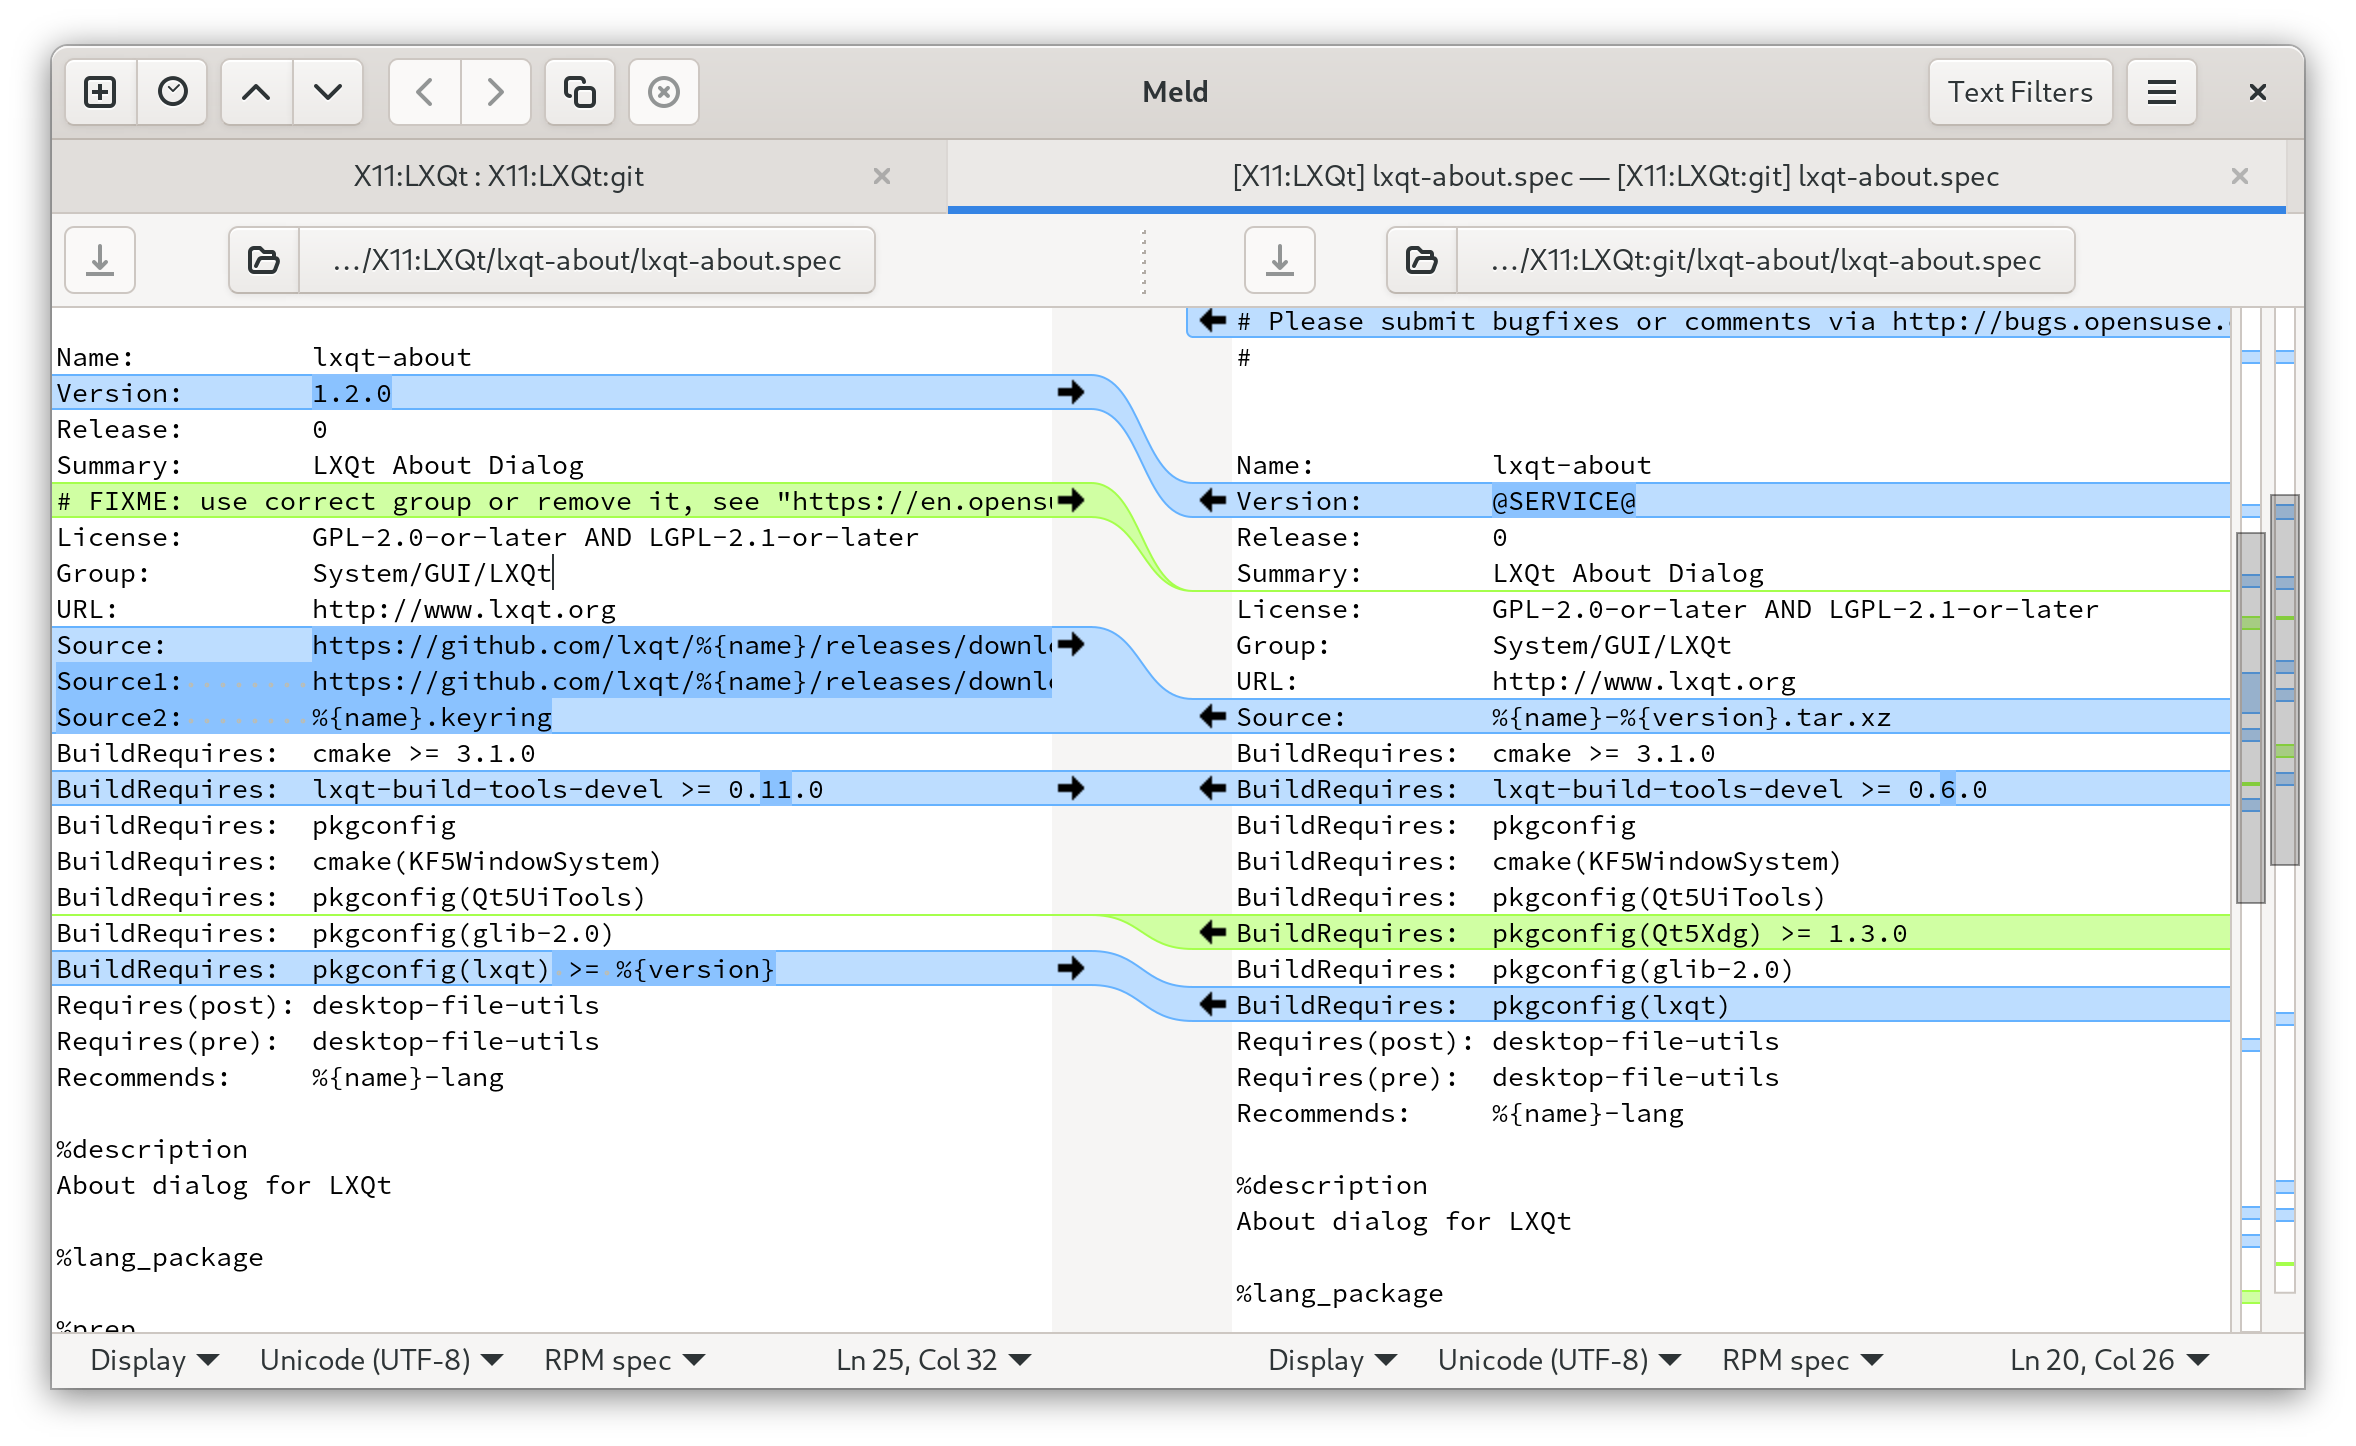
Meld is a GUI tool for comparing two files or directories. It also let's you easily merge changes.
We checked out two packages from the openSUSE OBS.
One is X11:LXQt/lxqt-about the other X11:LXQt:git/lxqt-about.
The difference is that one will be about the stable release of lxqt-about and the other will always be rebuild with the latest version of upstream git master.
We want to find out the differences and also merge/pull/push changes from the various files.
cd ~/obs
osc co X11:LXQt/lxqt-about
osc co X11:LXQt:git/lxqt-about
meld X11:LXQt X11:LXQt:git
These are tools to search in files. grep is the oldest of them.
ack is faster since it skips some directories like the .git and .subversion directories by default.
Useful for developers and maintainers. It can also search only specific file types.
For example ack --cc close searches all C files for the word close.
ag is yet a little faster than ack and ignores files mentioned in .gitignore. Additionally it can search compressed files.
HINT: When in a git repository, instead of using grep, try git grep to quickly search through the indexed files.
perf is a tool that can be used to analyze performance and trace functions.
magic-trace is similar to perf. The key difference from perf is that instead of sampling call stacks throughout time, magic-trace uses Intel Processor Trace to snapshot a ring buffer of all control flow leading up to a chosen point in time. Then, you can explore an interactive timeline of what happened.
The following tools will mostly be about debugging.
- What is That Process Doing? by Greg Price.
- Linux debugging tools I love by jvns.
- Recovering files using /proc by jvns.
- Some ways to get better at debugging by jvns.
- A debugging manifesto by jvns.
gdb is a debugger.
Basic example that shows how to use gdb in general.
> cat main.c

#include <stdio.h>
#include <stdlib.h>

int plus(int a, int b)
{
    return a+b;
}

int main()
{
    int n1 = 2;
    int n2 = 3;
    int r = plus(n1, n2);
    printf("Result: %d\n", r);
    return EXIT_SUCCESS;
}
Compile it with debug symbols:
gcc main.c -g -o plus
Debug:
(gdb) break plus
Breakpoint 1 at 0x401140: file main.c, line 6.
(gdb) run
Starting program: /home/user/src/plus
Breakpoint 1, plus (a=2, b=3) at main.c:6
6	    return a+b;
(gdb) print a
$1 = 2
(gdb) p b
$2 = 3
(gdb) next
7	}
(gdb) n
main () at main.c:14
14	    printf("Result: %d\n", r);
(gdb) p r
$3 = 5
With break we set the breakpoint to the function plus.
Then we start the program. It breaks at our first breakpoint.
Here we investigate the values of the variables a and b.
And then we continue to step through the program. At the end we look at the result.
The above example started the program we wanted to investigate.
If the program is already running you cat attach to it via its PID.
Use pidof of ps to find out the PID.
$ pidof vi
8140
$ gdb
(gdb) attach 8140
You can use plugins, scripts and tools to optmize your gdb usage for certain tasks.
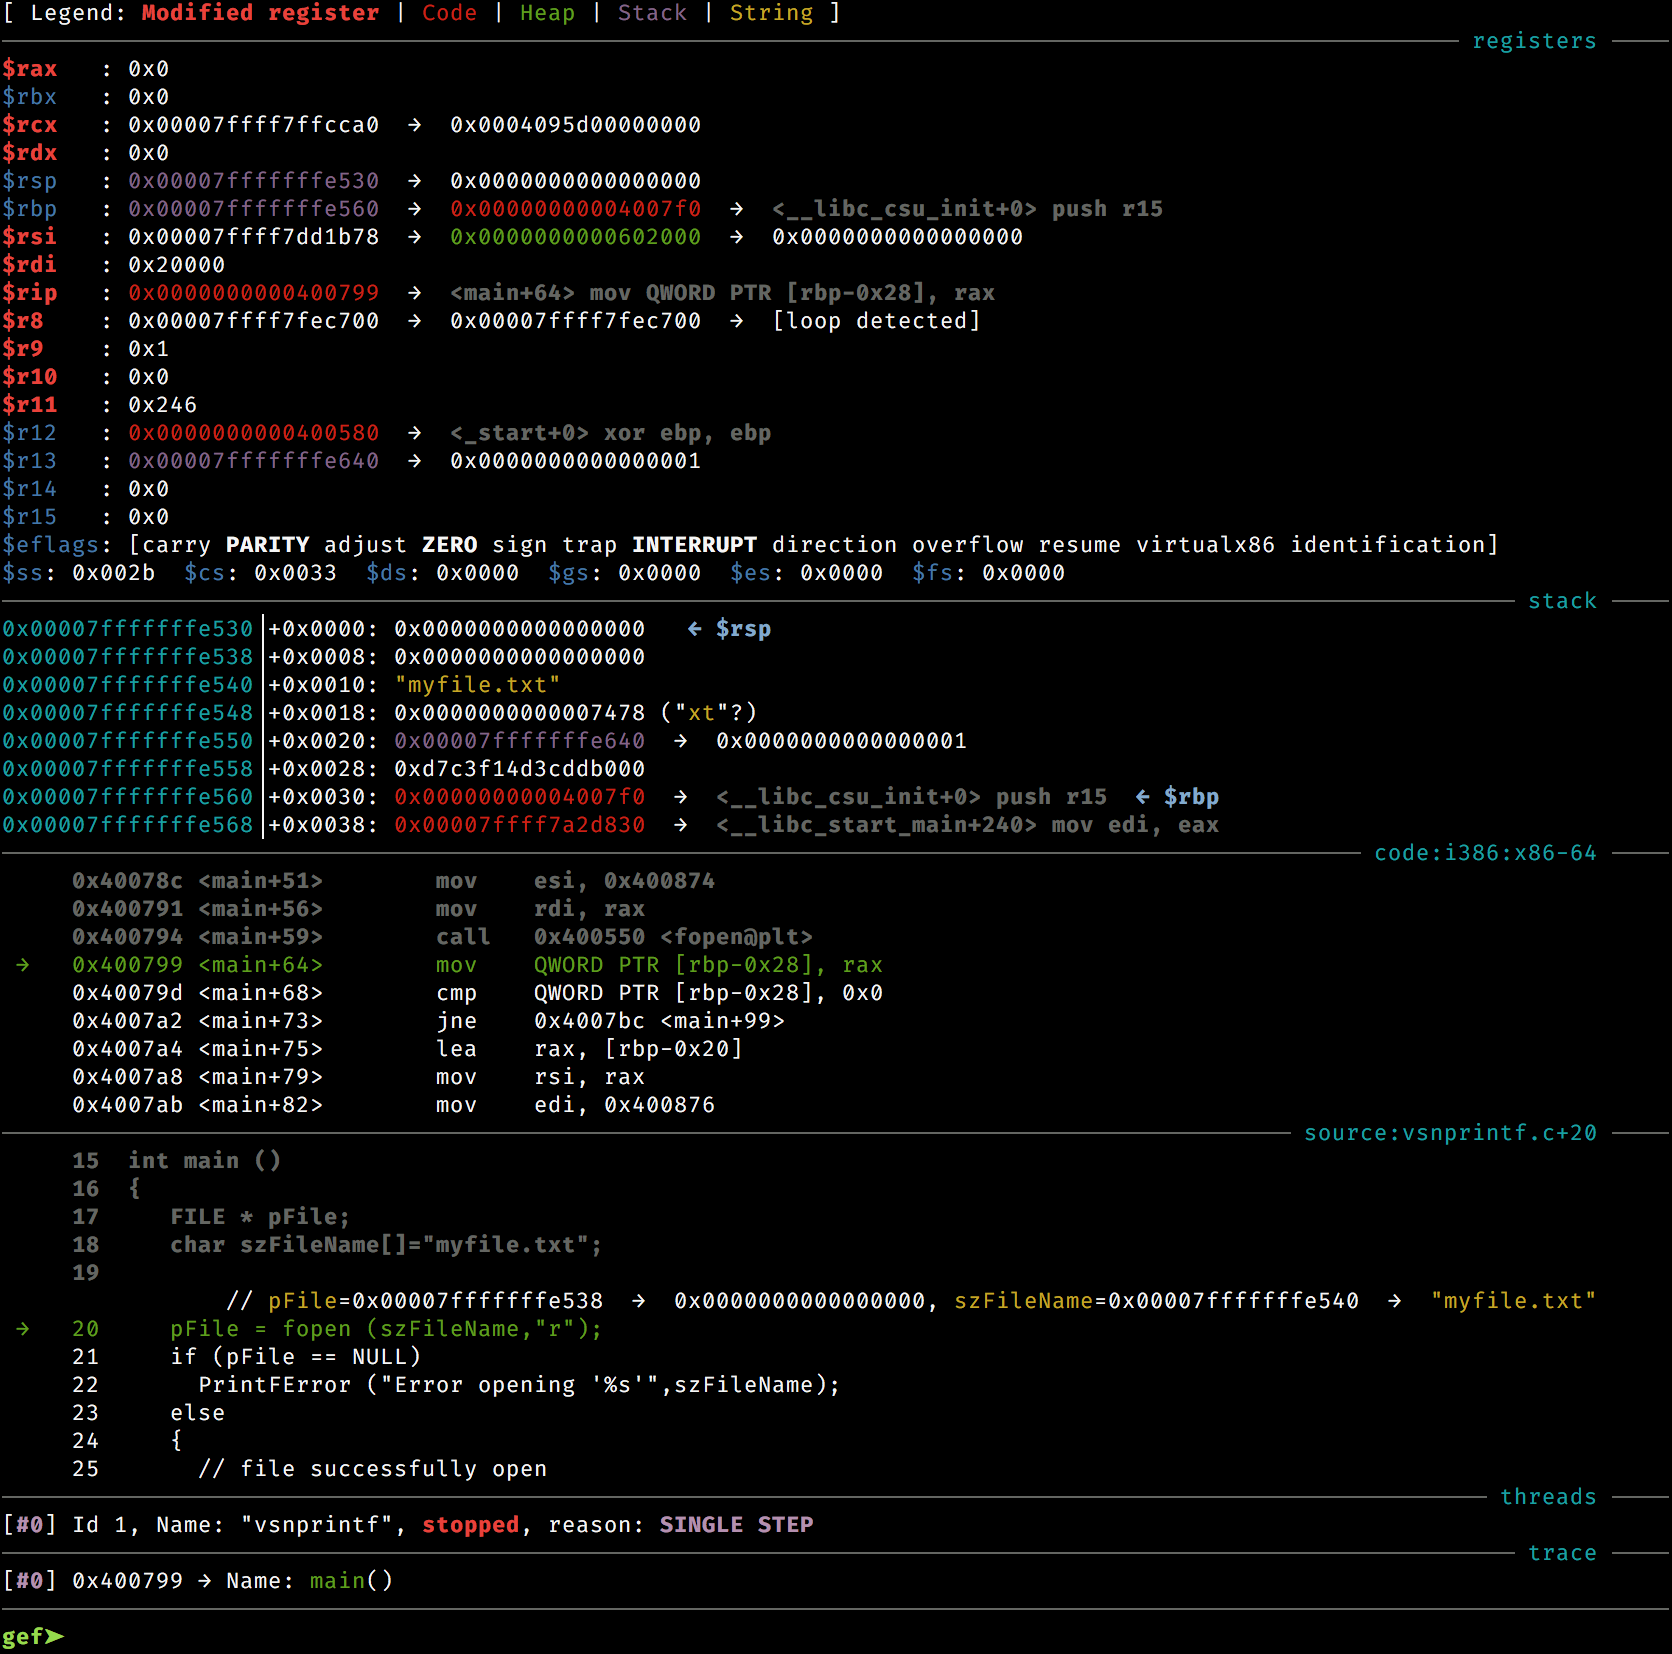
One example is gef. It assists exploit developers and reverse-engineers when using old school GDB. It provides additional features to GDB using the Python API to assist during the process of dynamic analysis and exploit development. Application developers will also benefit from it, as GEF lifts a great part of regular GDB obscurity, avoiding repeating traditional commands, or bringing out the relevant information from the debugging runtime.
ltrace is a debugging program which runs a specified command until the command exits. While the command is executing, ltrace intercepts and records both the dynamic library calls called by the executed process and the signals received by the executed process.
Running ltrace on the plus example program from above we see that it only calls printf:
ltrace ./plus
printf('R'Result: 5
)                                                                                                          = 10
+++ exited (status 0) +++
It's possible to use ltrace to produce very detailed output.
As an example, we'll be compiling a very simple C program, then using ltrace to find a lot of information concerning its execution.
Here's the C program:
#include <stdio.h>
#include <stdlib.h>

void first() {
  char *ptr = malloc(sizeof(char) * 500);
  free(ptr);
  printf("First.\n");
  second();
}

int main() {
  first();
}
We'll compile it disabling optimisations, and enabling debuginfo: gcc -O0 -g main.c -o prog
And now we'll call ltrace, redirecting what it prints to stderr, as that's where the relevant information will show up: ltrace -S -T -f -w 10 ./prog
Let's explain these flags, from man ltrace:
-S Display system calls as well as library calls
This will be useful if you ever want to see the syscalls as well. So in this case, ltrace crosses into strace territory.
-T Show the time spent inside each call. This records the time difference between the beginning and the end of each call.
This is just some extra timing information, which may come in handy when doing simple performance analyses.
-f Trace child processes as they are created by currently traced processes as a result of the fork(2) or clone(2) system calls. The new process is attached immediately.
This is to trace every single subprocess/subthread.
-w, --where nr Show backtrace of nr stack frames for each traced function. This option enabled only if elfutils or libunwind support was enabled at compile time.
Show a backtrace for each traced call.
And here's some interesting output from this example:
We can determine that main() calls first(), and it calls malloc(500):
[pid 21637] malloc(500 <unfinished ...>
[pid 21637] getrandom@SYS(0x7fb00bffcad8, 8, 1, 0x7fb00be13f50)                                                                                    = 8 <0.000024>
 > libc.so.6(ptmalloc_init.part.0+0x37) [7fb00bea02c5]
 > libc.so.6(__libc_malloc+0x216) [7fb00bea3bf4]
 > prog(first+0x11) [4011a3]
	main.c:14:15
 > prog(main+0xd) [4011d8]
	main.c:21:3
 > libc.so.6(__libc_start_call_main+0x81) [7fb00be2a1ef]
 > libc.so.6(__libc_start_main@@GLIBC_2.34+0x8a) [7fb00be2a2b8]
 > prog(_start+0x26) [401094]
	../sysdeps/x86_64/start.S:115
malloc() calls the brk syscall:
[pid 21637] brk@SYS(nil)                                                                                                                           = 0xc07000 <0.000012>
 > libc.so.6(brk+0xd) [7fb00bf07ccb]
 > libc.so.6(__sbrk+0xa8) [7fb00bf113e6]
 > libc.so.6(__default_morecore@GLIBC_2.2.5+0x17) [7fb00bea0f35]
 > libc.so.6(sysmalloc+0x56a) [7fb00bea1f58]
 > libc.so.6(_int_malloc+0xf24) [7fb00bea3162]
 > libc.so.6(tcache_init.part.0+0x34) [7fb00bea3282]
 > libc.so.6(__libc_malloc+0x11f) [7fb00bea3afd]
 > prog(first+0x11) [4011a3]
	/home/martin/git/awesome-package-maintainer/main.c:14:15
 > prog(main+0xd) [4011d8]
	/home/martin/git/awesome-package-maintainer/main.c:21:3
first() calls printf(), which calls puts() from glibc, and it will invoke the write syscall:
[pid 21637] puts("First." <unfinished ...>
[pid 21637] fstat@SYS(1, 0x7fffac04d890)                                                                                                           = 0 <0.000065>
 > libc.so.6(__fstat64+0xd) [7fb00bf01c8b]
 > libc.so.6(_IO_file_doallocate+0x5d) [7fb00be7bc1b]
 > libc.so.6(_IO_doallocbuf+0x4a) [7fb00be8b7f8]
 > libc.so.6(_IO_file_overflow@@GLIBC_2.2.5+0x199) [7fb00be897b7]
 > libc.so.6(_IO_file_xsputn@@GLIBC_2.2.5+0x108) [7fb00be8a356]
 > libc.so.6(_IO_puts+0x7a) [7fb00be7e608]
 > prog(first+0x2b) [4011bd]
	/home/martin/git/awesome-package-maintainer/main.c:16:3
strace monitors and tampers with interactions between processes and the kernel. Useful for watching system calls and signals.
Try running strace on the plus example program and examine its output.
- What problems do people solve with strace? by jvns.
- A workshop on strace & tcpdump by jvns.
- Debugging shared library problems with strace by jvns.
- Debug your programs like they're closed source! by jvns.
- Understanding how killall works using strace by jvns.
- Spying on ssh with strace by jvns.
ftrace is a tracing framework for the Linux kernel.
lsof is a utility that lists open files.
lsof -c vim
vim-nox11 17582 user  cwd    DIR   0,43       82 6826592 /home/user/awesome-package-maintainer
vim-nox11 17582 user    5u   REG   0,43    16384 7061198 /home/user/awesome-package-maintainer/.README.md.swp
ldd lists the shared libraries required by a program.
ldd ./src/myprog
	libcurl.so.4 => /lib64/libcurl.so.4 (0x00007f36e4297000)
Valgrind is a suite of tools for profiling and debugging. We are mostly interested in the memory error detector functionality of it.
It will track each bit of memory used by a program and can detect whether this memory is leaked, used twice, used before it has a value or freed twice.
G_SLICE=always-malloc G_DEBUG=gc-friendly valgrind -v --tool=memcheck --leak-check=full --log-file=valgrind.log $program $arguments
They display information about object files and can be used to view an executable in assembly.
- release-notes-scraper - grab the release notes for projects from GitHub that do not keep a CHANGELOG, but publish their release notes via the releases page.
- changesgen automates writing a (openSUSE) changes file.
- autoup searches on repology and tests whether updating to those would work in OBS
- mgornys Gentoo dev scripts
Even if you are not interested in RPM, we would like to suggest to read the RPM Packaging Tutorial since it gives a good overview and introduction.
Then see the following system specific chapters here according to your interest. Generally we would recommend to skim also over the ones that are not your main focus.
- Contribute to Buildroot
Create and send a patch to the mailing list:
git clone https://git.busybox.net/buildroot
cd buildroot
vi package/libstrophe/libstrophe.{mk,hash}
git checkout -b libstrophe-update-xxx
git add package/libstrophe/libstrophe.{mk,hash}
git commit #write a nice message. use git log to see message of others
# create a patch
git format-patch -M -n -s -o outgoing origin/master
# send the patch to the ml
git send-email --smtp-debug --smtp-ssl-cert-path "" --to="buildroot@busybox.net" outgoing/0001-mypatchname.patch
For Debian packaging, Debian Developer's Corner has all important details, pay especial attention to the Debian Policy.
- Debian Developer's Corner
- Debian Policy
- Debian New Maintainers' Guide
- Packaging on the Debian wiki
- Debian Developer's Reference
- Salsa GitLab instance to host package sources.
- Packaging Tutorial: GNU Hello
- RPM Packaging Guide - about the basics of RPM packaging
- Fedora Packaging Guidelines
- mock - a simple chroot build environment manager for building RPMs.
- koji - Fedoras build system.
- copr - buildsystem that allows contributors to create packages, put them in repositories, and make it easy for users to install the packages onto their system.
- pagure - code hosting.
- Read the RPM section of this readme as well.
- Gentoo devmanual
- Proxied Maintainer FAQ
- Contribute via Pull Requests
- Join
#gentoo-dev-helpand#gentoo-proxy-mainton Libera.Chat
We recommend to use portage with git and use that as your working tree as well.
Edit /etc/portage/repos.conf/gentoo.conf to include:
volatile = no
clone-depth = 0
sync-depth = 0
This will make portage aware that there can be changes in the repo not done by portage and do none shallow git clones.
This will See man 5 portage for more details.
Useful tools:
- pkgdev
- pkgcheck
- equery
- ekeyword
- portageq
- iwdevtools - tools to aid with Gentoo development, primarily intended for QA
- ebump - ebuild revision bumper
- mgorny-dev-scripts - mgornys ebuild development scripts
- sam-gentoo-scripts - sams Gentoo development scripts
- Get a template from Quickstart
- Read about the process of adding a new ebuild
- Generate the manifest
ebuild foo.ebuild manifest - Build it
ebuild foo.ebuild merge. Seeman ebuild.
Use ekeyword:
$ ekeyword ~all my-2.0.ebuild
Use portageq:
$ portageq distdir

/var/cache/distfiles
Use equery:
$ equery b /usr/share/vim/vim90
 * Searching for /usr/share/vim/vim90 ...
app-editors/vim-core-9.0.1000 (/usr/share/vim/vim90)
Use equery:
$ equery f vim
 * Searching for vim ...
 * Contents of app-editors/vim-9.0.1000:
/usr
/usr/bin
/usr/bin/rview -> vim
/usr/bin/rvim -> vim
/usr/bin/vim
/usr/bin/vimdiff -> vim
/usr/share
/usr/share/applications
/usr/share/applications/vim.desktop
/usr/share/bash-completion
/usr/share/bash-completion/completions
/usr/share/bash-completion/completions/ex -> vim
/usr/share/bash-completion/completions/rview -> vim
/usr/share/bash-completion/completions/rvim -> vim
/usr/share/bash-completion/completions/vi -> vim
/usr/share/bash-completion/completions/view -> vim
/usr/share/bash-completion/completions/vim
/usr/share/bash-completion/completions/vimdiff -> vim
openSUSE develops and uses the Open Build System. It is a quite powerful generic system to build and distribute packages from sources in an automatic, consistent and reproducible way. It can not only build rpm packages for openSUSE but also packages for Debian, Ubuntu, Fedora, Arch Linux, AppImages and more.
Start by creating an account on:
- the issue tracker: https://bugzilla.opensuse.org/
- the openSUSE Open Build Service (OBS): https://build.opensuse.org/
- Join
#opensuse-factoryon Libera.Chat
Then, in order:
- Build Service Tutorial - follow along style introduction
- openSUSE Packaging Guidelines
- Creating a ChangeLog
- Packaging documentation on the openSUSE wiki - bookmark this
- Build Service Tips and Tricks - learn useful tricks
- How to contribute to Factory - learn the workflow and some more tricks
- RPM Packaging Guide - about the basics of RPM packaging
- Read the RPM section of this readme as well.
maintainers.opensuse.org is a helpful tool listing all the maintainers of a package, comparing the versions in differnt distributions, pointing to the devel project etc.
Install
- grc (
zypper in grc) to have colorized and more readable output when building withgrc osc build. - spec-cleaner (
zypper in spec-cleaner) to clean the spec file according to the style guide.
Configure osc $EDITOR $HOME/.config/osc/oscrc.
[https://api.opensuse.org]
user = <youruser>
pass = <yourpassword>
email = <youremail>
Add some useful tools which will be available in the chroot (osc chroot):
extra-pkgs = vim gdb strace less unzip
Some useful aliases for your bashrc/zshrc etc. If you use grc you could add this as well.
alias oscb="osc build --ccache --cpio-bulk-download --download-api-only"
alias oscsd="osc service localrun download_files"
alias oscsd2="osc service disabledrun download_files"
So you don't have to provide a password each time you build a package you should add yourself to the sudoers file:
# general file /etc/sudoers
sudo visudo
# or specific file which will be included in /etc/sudoers via `@includedir /etc/sudoers.d`
sudo visudo /etc/sudoers.d/username
With following content:
yourusername ALL = NOPASSWD: /usr/bin/build
yourusername ALL = NOPASSWD: /usr/bin/osc
You can asign aliases to OBS instances.
Edit $HOME/.config/osc/oscrc:
[https://api.opensuse.org]
user = <youruser>
pass = <yourpassword>
email = <youremail>
aliases = obs

[https://api.anotherbuildsystem.org]
user = <youruser>
pass = <yourpassword>
email = <youremail>
aliases = abs
In your bashrc you could then have:
alias asc="osc -A abs"
To easily work on another instance: asc co home:someone/package
# create the package in your OBS home
osc meta pkg -e home:myusername awesomenewpackage
# check it out locally
osc co home:myusername awesomenewpackage
# write the spec file
vi awesomenewpackage.spec
# download the sources
oscsd
# write the changelog
osc vc
# commit it to your home
osc ci
# submit to a devel project
osc sr utilities
In the above example the sources will be downloaded using the download_files service.
You should use URL to the upstream tarball in your spec file.
OBS will later verify the tarball is the same like the one you added.
# branch the package. getpac will branch from the actual devel project automatically
# getpac is a combination of `osc branch` and `osc checkout`
osc getpac openSUSE:Factory profanity
# change dir. the corresponding dir will be printing out for you in the last step
cd home:jubalh:branches:network:messaging:xmpp/profanity
# make changes
vi *.spec
# build it
oscb
# describe your change so that others can understand it
osc vc
# commit it to your branched version
osc ci
# submit it to the devel repo
osc sr
Let's say you fixed a bug in one of your packages and want to run the reproducer to confirm that the bug is fixed.
You don't want to install the package in question on your local machine, so one way of doing it is inside chroot. osc makes it easy to set everything up for you.
user@machine:~> osc build -x sassc --rsync-src ~/work/reproducers/libsass --rsync-dest /tmp/poc
user@machine:~> osc chroot
abuild@machine:~> sassc /tmp/poc/poc-CVE-2022-43357
Using the -x flag you can install more packages into the chroot, in this case sassc. This way you can install any development tools you need.
You have all your reproducers in one directory, the two rsync parameters map them over into the chroot.
Then you switch into it and run the poc.
This is especially helpful because you can also run tests against other targets. Like against a certain version of SLE or openSUSE that differs from your locally installed one.
With the --prefer-pkgs flag you can name a directory and osc build prefer the rpms inside over the ones from the official repo.
OBS services are helpful to package git packages for example. Or Rust packages that use vendored tarballs.
Read the OBS chapter on using source services to learn how they work.
And take a look at the list of existing services.
The Packaging Rust Software article shows you how to use source services to package Rust software. It's a good example of services and contains a template to get you started.
osc copypac -r rev prj pkg prj pkg
In case you want to develop on the program you might want a quick way to get all the build requirements:
zypper si -d profanity
Let's say you maintain the libstrophe library and want to find out which packages depend on in (in Factory on x86_64):
osc whatdependson openSUSE:Factory libstrophe standard x86_64
If you use this often you could add a function to your .bashrc:
whatdependson () {
    osc whatdependson openSUSE:Factory $1 standard x86_64
}
Example output:
whatdependson libstrophe
libstrophe :
   profanity
   xmppc
List your repositories with zypper lr. There should be one with the name Main Repository (DEBUG).
It might be disabled so enable it with zypper mr --enable NUMBER.
zypper in nudoku-debuginfo
...
The following 2 NEW packages are going to be installed:
  nudoku-debuginfo nudoku-debugsource
As we can see they are split in the debuginfo package and a package containing the source code.
The source code will be installed under /usr/src/debug as can be seen by:
rpm -ql nudoku nudoku-debugsource
/usr/src/debug/nudoku-2.1.0-1.12.x86_64
/usr/src/debug/nudoku-2.1.0-1.12.x86_64/src
/usr/src/debug/nudoku-2.1.0-1.12.x86_64/src/main.c
/usr/src/debug/nudoku-2.1.0-1.12.x86_64/src/outp.c
/usr/src/debug/nudoku-2.1.0-1.12.x86_64/src/outp.h
/usr/src/debug/nudoku-2.1.0-1.12.x86_64/src/sudoku.c
/usr/src/debug/nudoku-2.1.0-1.12.x86_64/src/sudoku.h
The debuginfo will be availalbe under: /usr/lib/debug as can be seen by:
rpm -ql nudoku nudoku-debuginfo
/usr/lib/debug
/usr/lib/debug/.build-id
/usr/lib/debug/.build-id/d9
/usr/lib/debug/.build-id/d9/a534c47a4b2def13daa6ba59507b5fbd8ae3d2
/usr/lib/debug/.build-id/d9/a534c47a4b2def13daa6ba59507b5fbd8ae3d2.debug
/usr/lib/debug/usr
/usr/lib/debug/usr/bin
/usr/lib/debug/usr/bin/nudoku-2.1.0-1.12.x86_64.debug
- RPM packaging for beginners by DimStar77.
- Per service ulimits by darix.
- Howto patch a rubygem based package? by darix.
- Quilt Quick How-to by darix.
- OSC interactive review by darix.
- Hooking up instantiated services with RPM by darix.
- OSC helpers for lazy packagers by darix.
- Debug a crash after it happened – without knowing about it upfront by DimStar77.
- How to find, debug and fix reproducibility issues in openSUSE OBS package build results by bmwiedemann.
rpm -ql vim
rpm -qf /usr/bin/vim
Since rpm 4.18 you can find the parsed and expanded spec file in the src.rpm headers. This can be useful to know which values are actually used, what the macros were expanded to. Generally what the actual build recipe looked like.
rpm -q --queryformat="%{Spec}" /path/to/src.rpm
pkgdiff is a good tool to compare and visualize changes in packages. It supports a range of formats like rpm, deb, tar.gz.
Thanks to everybody who contributed to this guide and to the authors of all the linked Websites, blogs, etc.
Special thanks and credit to the whole SUSE Pack team, and to:
- Tomáš Chvátal
- Dominique Leuenberger
- Marcus Rueckert
- Andreas Sturmlechner